T-Shirt Mockup GIMP: A Comprehensive Guide to Creating Realistic Apparel Mockups
Introduction
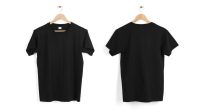
In the realm of apparel design and marketing, T-shirt mockups have become an indispensable tool, allowing designers and businesses to showcase their creations in a professional and visually appealing manner. GIMP, a free and open-source image editing software, offers a versatile platform for creating realistic and customizable T-shirt mockups. This comprehensive guide will delve into the intricacies of T-shirt mockup creation in GIMP, empowering you with the knowledge and techniques to elevate your apparel presentations.
Understanding the Importance of T-Shirt Mockups
T-shirt mockups serve a multifaceted role in the apparel industry, encompassing both design and marketing purposes:
-
Visualization and Design Iteration: Mockups allow designers to visualize their T-shirt designs on a lifelike model, enabling them to assess aesthetics, color combinations, and overall impact. This iterative process facilitates design refinement and optimizes the final product.
-
Marketing and Promotion: High-quality T-shirt mockups serve as compelling marketing materials, capturing the attention of potential customers and showcasing the product’s features and appeal. They can be used on websites, social media platforms, and printed advertisements to generate interest and drive sales.
Prerequisites for T-Shirt Mockup Creation in GIMP
Before embarking on the mockup creation process, ensure you have the following prerequisites in place:
-
GIMP Software: Download and install the latest version of GIMP from its official website.
-
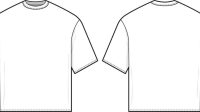
High-Resolution T-Shirt Template: Acquire a high-resolution T-shirt template that aligns with your desired garment style and perspective.
-
Design Artwork: Prepare your T-shirt design as a transparent PNG or PSD file.
Step-by-Step T-Shirt Mockup Creation in GIMP
-
Import the T-Shirt Template: Launch GIMP and import the T-shirt template by dragging and dropping it onto the canvas.
-
Create a New Layer for the Design: Right-click in the Layers Panel and select "New Layer." Name the layer "Design" and leave the other settings as default.
-
Import the Design Artwork: Import your T-shirt design into GIMP as a separate layer. Ensure that the layer is positioned above the "Design" layer.
-
Transform and Position the Design (Optional): If necessary, transform the design layer to adjust its size, rotation, or position on the T-shirt. Use the Scale, Rotate, and Move tools to achieve the desired placement.
-
Create a Clipping Mask: With the design layer selected, right-click on the "Design" layer below it and select "Add Layer Mask." This will confine the design within the boundaries of the T-shirt template.
-
Add Shadows and Highlights (Optional): To enhance the realism of the mockup, add shadows and highlights to the design using the Gradient Tool. Create a new layer for the shadows and apply a black-to-transparent gradient along the edges of the design. Repeat the process for highlights using a white-to-transparent gradient.
-
Adjust Color and Lighting (Optional): Fine-tune the mockup’s overall color balance and lighting by adjusting the levels, curves, or color balance settings in GIMP’s Image menu.
-
Export the Mockup: Once satisfied with the mockup, export it as a high-resolution JPEG, PNG, or TIFF file for use in marketing materials or presentations.
Advanced Techniques for Enhancing Mockups
-
Use Smart Objects: Convert the design layer into a Smart Object to preserve its resolution and allow for non-destructive editing. This enables you to make changes to the design without affecting the mockup itself.
-
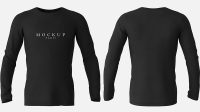
Create Multiple Views: Generate mockups from multiple angles, such as front, back, and side views, to provide a comprehensive representation of the T-shirt design.
-
Add Background: Place the mockup within a realistic background environment, such as a retail store or outdoor setting, to enhance the context and appeal.
-
Experiment with Textures and Effects: Apply textures to the T-shirt material or add special effects, such as wrinkles or creases, to give the mockup a more authentic look.
Frequently Asked Questions (FAQs)
- What are the benefits of using GIMP for T-shirt mockups?
GIMP is free and open-source, making it accessible to all users. It offers a wide range of editing tools, including advanced features such as layers, masks, and smart objects. GIMP’s community support and extensive documentation provide valuable resources for troubleshooting and learning.
- Where can I find high-resolution T-shirt templates?
Many websites and marketplaces offer free and premium T-shirt templates. Some popular options include Placeit, Freepik, and GraphicRiver.
- How do I create a transparent background for my design?
Open your design in GIMP and select the "Layer" menu. Choose "Transparency" and then "Add Alpha Channel." Alternatively, you can use the "Eraser" tool to manually remove the background.
- Can I use GIMP to create mockups for other apparel items?
Yes, GIMP can be used to create mockups for a variety of apparel items, including hoodies, sweatshirts, pants, and dresses. The process is similar to creating T-shirt mockups, but you will need to use different templates that correspond to the specific garment type.
- How can I improve the realism of my mockups?
Pay attention to lighting and shadows to create a sense of depth and dimension. Use textures and effects to add realistic details, such as wrinkles, creases, and fabric folds. Experiment with different backgrounds and environments to enhance the context and appeal of your mockups.
Conclusion
Mastering T-shirt mockup creation in GIMP empowers you to showcase your apparel designs with impact and professionalism. By following the steps outlined in this guide and exploring advanced techniques, you can elevate your T-shirt presentations, captiv


