
How to Create Captivating Mockups: A Step-by-Step Guide
In the realm of marketing and design, mockups hold immense significance in showcasing your ideas and concepts in a visually engaging manner. They serve as realistic representations of real-world products or applications, giving viewers a tangible sense of what the final outcome will be. Whether you’re designing a new logo, packaging, or website, creating professional mockups can elevate your presentation and leave a lasting impression.
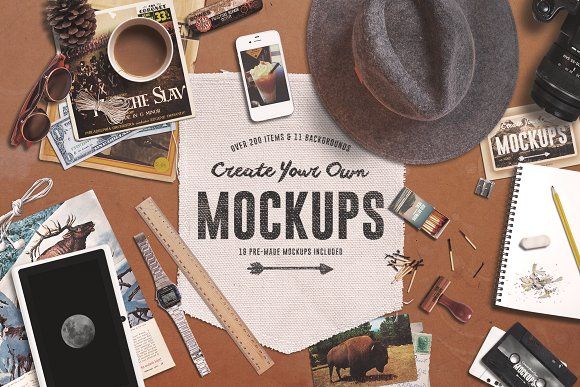
Mastering the art of creating your own mockups is a valuable skill that can enhance your creative arsenal. In this comprehensive guide, we’ll delve into the intricacies of mockup creation, providing you with a step-by-step approach that will empower you to craft stunning mockups that truly bring your designs to life.
Step 1: Choose the Right Software
The foundation of your mockup creation journey begins with selecting the appropriate software. A wide range of software options is available, each catering to specific needs and skill levels. Here are some popular choices:
-
Adobe Photoshop: A versatile and powerful tool for advanced designers, Photoshop offers a comprehensive suite of features for creating realistic and complex mockups.
-
Figma: A collaborative online platform designed for both individual and team-based mockup creation, Figma streamlines the workflow and facilitates seamless sharing.
-
Canva: A user-friendly online service ideal for beginners, Canva provides a vast library of pre-designed mockups and intuitive editing tools.
-
Sketch: A vector-based design application tailored for UI/UX designers, Sketch excels in creating high-fidelity mockups with precise control over details.
Step 2: Gather High-Quality Images
The cornerstone of any convincing mockup is high-quality images that accurately depict the real-world object or environment you wish to emulate. When selecting images, consider the following factors:
-
Resolution: Opt for images with high resolution to ensure crisp and detailed mockups.
-
Dimensions: Choose images that correspond to the dimensions of the final mockup to avoid distortion or stretching.
-
Perspective: Carefully consider the perspective and angle of the image to create a realistic representation of the product or design.
Step 3: Create a Transparent Background
For seamless integration of your design into the mockup, it’s crucial to remove the background of the image. Follow these techniques to achieve transparency:
-
Automatic Background Removal Tools: Many software programs offer automated background removal tools that can quickly isolate the object from its background.
-
Manual Background Removal: Use the eraser tool or selection tools to meticulously remove the background by hand, ensuring precision and control.
-
Online Background Removal Services: Numerous online services specialize in removing backgrounds from images, providing a convenient and efficient solution.
Step 4: Adjust Perspective and Lighting
Properly adjusting the perspective and lighting of your design within the mockup is essential for creating a cohesive and realistic presentation. Utilize the following techniques:
-
Perspective Transform: Employ the perspective transform tool to match the angle and viewpoint of the object in the mockup, creating a seamless integration.
-
Lighting Adjustments: Adjust the lighting in your design to match the lighting conditions of the mockup, ensuring consistency and natural-looking results.
Step 5: Add Shadows and Highlights
Shadows and highlights add depth and dimension to your mockups, lending them a professional and polished touch. Incorporate these elements using the following methods:
-
Layer Effects: Utilize layer effects within your software to add realistic shadows and highlights to your design, enhancing its three-dimensional appearance.
-
Drop Shadows: Create realistic drop shadows beneath objects to simulate the effect of natural light and add depth to the mockup.
Step 6: Finalize and Export
Once you’re satisfied with the appearance of your mockup, it’s time to finalize and export it in the desired format. Consider the following steps:
-
Save as High-Resolution File: Export your mockup in a high-resolution format, such as PNG or JPEG, to maintain the quality and clarity of the final image.
-
Choose the Correct File Format: Select the appropriate file format based on your intended use. For web applications, PNG is a good choice, while JPEG is better suited for print.
-
Optimize for File Size: Optimize your mockup file for size to facilitate easy sharing and web use without compromising image quality.
Step 7: Additional Tips for Enhancing Your Mockups
-
Use Smart Objects: Utilize smart objects in Photoshop to maintain the editability of your design within the mockup, allowing for easy updates and revisions.
-
Experiment with Different Mockups: Explore various mockup templates and styles to find the one that best complements your design and conveys your desired message.
-
Pay Attention to Detail: Meticulously attend to the details of your mockups, ensuring that every element is aligned, positioned, and scaled correctly.
-
Seek Feedback: Share your mockups with others to gather feedback and constructive criticism, helping you refine and improve their effectiveness.
FAQ: Unraveling Common Mockup Creation Queries
-
What is the purpose of a mockup?
Mockups serve as realistic representations of real-world products or applications, providing a tangible sense of what the final outcome will be. They are widely used in marketing, design, and development to showcase ideas and concepts in a visually engaging manner. -
What are the key elements of a good mockup?
A good mockup should possess high-resolution images, transparent backgrounds, accurate perspective and lighting, and realistic shadows and highlights. Additionally, it should be finalized in an appropriate file format and optimized for file size. -
What software is recommended for creating mockups?
Popular software choices for mockup creation include Adobe Photoshop, Figma, Canva, and Sketch. Each software offers unique features and capabilities, catering to different needs and skill levels. -
How can I improve the realism of my mockups?
To enhance the realism of your mockups, experiment with different lighting conditions, add realistic shadows and highlights, and pay close attention to details such as alignment, positioning, and scale. -
What are some creative uses of mockups?
Mockups can be creatively utilized to showcase website designs, packaging concepts, app interfaces, product designs, and marketing materials. They are a versatile tool for presenting ideas and concepts in a compelling and visually appealing way.
Conclusion
Creating your own mockups empowers you with the ability to effectively showcase your designs and concepts, leaving a lasting impression on viewers. By following the step-by-step approach outlined in this guide, you can develop captivating mockups that truly bring your ideas to life. Remember to experiment, seek feedback, and refine your skills over time to become a master of mockup creation.


