
Unleash Your Creativity: A Comprehensive Guide to Creating Custom T-Shirts with DIY Templates
In the realm of self-expression, custom T-shirts stand as veritable canvases for your imagination. With the advent of DIY templates, the power to design and create unique T-shirts has become accessible to all. Whether you’re a seasoned designer or a novice enthusiast, this comprehensive guide will empower you with the knowledge and techniques to craft stunning custom T-shirts that reflect your individual style.
Chapter 1: Embracing the DIY Spirit
Embarking on a DIY project not only grants you the freedom to personalize your wardrobe but also ignites your creativity. Custom T-shirts serve as a perfect starting point for those eager to explore the world of DIY. With a touch of imagination and a dash of effort, you can transform ordinary T-shirts into wearable masterpieces.
Chapter 2: Gathering Essential Materials
Before embarking on your creative journey, it’s crucial to gather the necessary materials:
• Plain T-shirts: Choose high-quality T-shirts in various colors and sizes to suit your preferences.
• DIY Template: Select a template that aligns with your design vision. Numerous free and paid options are available online.
• Fabric paint or markers: Explore a wide range of colors and finishes to bring your designs to life.
• Paintbrushes or fabric markers: Invest in quality brushes or markers to ensure precise and vibrant application.
• Stencils (optional): Enhance your designs with intricate patterns or motifs using stencils.
• Iron and ironing board: Properly setting your designs requires a reliable iron and ironing board.
Chapter 3: Conceiving Your Design
The key to a successful custom T-shirt lies in a well-conceived design. Consider these factors:
• Theme and Concept: Determine the overall theme or concept of your design, whether it’s abstract, humorous, or meaningful.
• Colors and Patterns: Experiment with different color combinations and patterns to create visual impact.
• Typography and Font: Choose fonts and typography that complement the design and convey your message effectively.
• Imagery and Graphics: Incorporate images, graphics, or logos to enhance the visual appeal of your T-shirt.
Chapter 4: Mastering Stenciling Techniques
Stencils offer a precise and efficient method of applying designs to your T-shirts. Here’s how:
• Secure the Stencil: Position the stencil on the T-shirt and secure it with tape or adhesive spray.
• Apply Fabric Paint or Markers: Using a brush or marker, carefully apply fabric paint or marker over the stencil openings.
• Remove the Stencil: Once the paint has dried slightly, gently lift the stencil to reveal the design.
Chapter 5: Unleashing Your Inner Artist with Freehand Painting
Freehand painting allows you to fully express your creativity. Follow these steps:
• Sketch the Design: Lightly sketch your design onto the T-shirt using a pencil or fabric marker.
• Apply Paint or Markers: Dip your brush or marker into the fabric paint or marker and carefully trace the sketched design.
• Build Layers and Details: Add depth and dimension to your design by applying multiple layers of paint or marker.
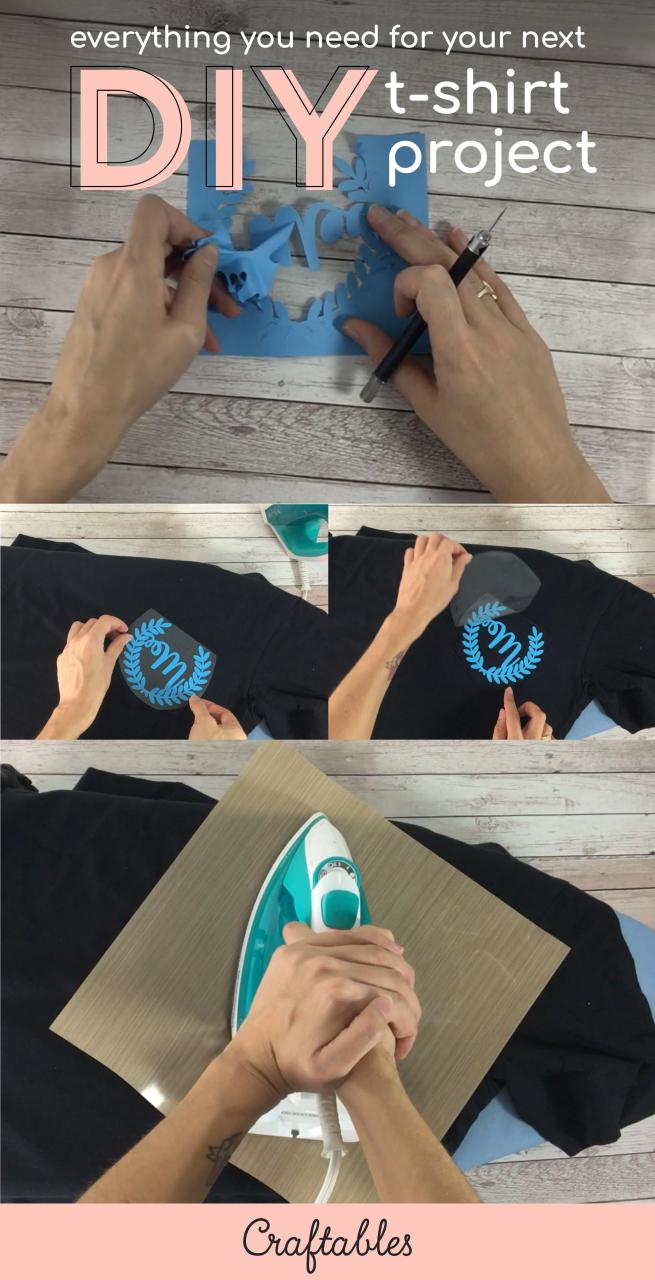
Chapter 6: Setting Your Designs for Lasting Wear
To ensure the longevity of your custom T-shirts, proper setting is essential:
• Heat Setting: Place a cloth or parchment paper over the design and iron it on a medium heat setting. This helps the paint or marker adhere to the fabric.
• Washing Instructions: Follow the care instructions on the fabric paint or marker packaging to ensure proper washing and maintenance.
Chapter 7: Troubleshooting Common Challenges
• Bleeding Colors: To prevent colors from bleeding, use high-quality fabric paint or markers designed for T-shirts.
• Cracking or Peeling Paint: Ensure the paint is applied evenly and not too thickly. Heat setting properly also helps prevent cracking and peeling.
• Design Placement: Plan the placement of your design carefully to avoid distortions or misalignments.
• Stencil Issues: Use sharp, clean stencils and apply even pressure when painting to avoid smudging or blurred lines.
FAQ
1. What types of fabric paints or markers should I use?
Answer: Opt for fabric paints or markers specifically designed for T-shirts. These products are formulated to adhere well to the fabric and withstand washing.
2. How do I prepare my T-shirt for painting or stenciling?
Answer: Wash and dry the T-shirt to remove any coatings or sizing. Iron it to smooth out any wrinkles.
3. Can I use regular paint or markers on T-shirts?
Answer: Regular paint or markers are not recommended for T-shirts as they may not adhere properly or withstand washing.
4. How do I remove excess paint or marker?
Answer: While the paint or marker is still wet, use a damp cloth to gently blot away any excess. Once dry, you can use a fabric paint remover or alcohol to remove small smudges or mistakes.
5. Can I layer different colors of fabric paint or markers?


