Creating a T-Shirt Mockup in Silhouette Studio: A Comprehensive Guide
Introduction
Creating a realistic T-shirt mockup is essential for showcasing your designs in a professional and engaging manner. Silhouette Studio, a popular software for crafters and designers, empowers you to easily create high-quality mockups with a wide range of customization options. This comprehensive guide will walk you through the step-by-step process of creating a T-shirt mockup in Silhouette Studio, enabling you to present your designs in a captivating way.
Gathering Materials
Before you begin creating your mockup, gather the following materials:
- Silhouette Studio software (free version or paid Designer Edition)
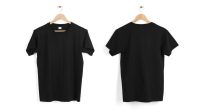
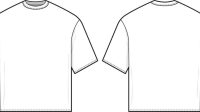
- A T-shirt image (front and back view, if desired)
- Your design (in PNG, SVG, or DXF format)
Step-by-Step Instructions
1. Import the T-Shirt Image
-
Open Silhouette Studio and import your T-shirt image by clicking "File" > "Open" and selecting the image file.
-
Position the T-shirt image on the canvas and scale it to the desired size.
2. Ungroup the T-Shirt Image
- Right-click on the T-shirt image and select "Ungroup." This will separate the T-shirt front and back into individual layers.
3. Hide the Back of the T-Shirt
- If you want to focus on the front of the T-shirt, hide the back by clicking on the "Eye" icon next to the back layer in the Layers panel.
4. Import Your Design
- Import your design file into Silhouette Studio by clicking "File" > "Import" and selecting the file.
5. Position and Scale Your Design
- Drag and drop your design onto the T-shirt image and position it as desired. Use the handles to scale and rotate the design.
6. Lock the Design
- To prevent accidental movement of your design, right-click on it and select "Lock."
7. Cut Line Settings
- If you plan to cut your design using a Silhouette machine, ensure the cut lines are set correctly. Click "Cut Settings" in the right panel and adjust the settings as needed.
8. Send to Printer
- When satisfied with your mockup, click "File" > "Print" to print the T-shirt design. Alternatively, you can save the mockup as a PNG or PDF for digital use.
Customization Options
Silhouette Studio offers a range of customization options to enhance your mockups:
-
Change the T-Shirt Color: Double-click on the T-shirt layer and use the Fill Color tool to select a new color.
-
Add Texture to the T-Shirt: Right-click on the T-shirt layer and select "Fill Pattern." Choose a pattern and adjust its scale and opacity.
-
Create a Folded Look: Use the "Weld" tool to merge parts of the T-shirt layer, creating folds and wrinkles for a more realistic effect.
-
Add a Background: Import a background image or use the Fill Color tool to create a solid-colored background for your mockup.
Troubleshooting
-
Design Not Printing Correctly: Ensure the design is unlocked, positioned correctly, and has the appropriate cut settings.
-
T-Shirt Image Distorted: Scale the T-shirt image proportionally to maintain its shape and avoid distortion.
-
Mockup Not Realistic: Pay attention to details such as shadows, wrinkles, and folds to create a convincing mockup.
FAQ
Q: What file formats are compatible with Silhouette Studio?
A: Silhouette Studio supports a wide range of file formats, including PNG, SVG, DXF, JPEG, and BMP.
Q: Can I use the free version of Silhouette Studio to create mockups?
A: Yes, you can use the free version to create basic mockups. However, some features, such as advanced editing and design tools, are only available in the Designer Edition.
Q: How do I make the design appear "printed" on the T-shirt?
A: Use the "Print and Cut" feature to send both the design and the T-shirt image to your printer, allowing for precise alignment.
Q: Can I create mockups for different T-shirt styles?
A: Silhouette Studio offers a library of pre-made T-shirt templates for various styles, including crew neck, V-neck, and polo shirts.
Q: How do I share my mockups?
A: Save your mockups in PNG or PDF format and share them online or through email.
Conclusion
Creating a T-shirt mockup in Silhouette Studio is a straightforward and rewarding process that allows you to present your designs in a visually appealing and professional manner. By following the steps outlined in this guide and exploring the customization options, you can create realistic and eye-catching mockups that showcase your designs in the best possible light.


