Creating Realistic Shirt Mockups in Adobe Photoshop: A Comprehensive Guide
Introduction:
In the realm of e-commerce and design, showcasing your apparel products in a professional and visually striking manner is paramount. Shirt mockups serve as an invaluable tool to present your designs on realistic garments, allowing potential customers to visualize the final product and make informed decisions. Adobe Photoshop, the industry-leading photo editing software, offers an array of features and techniques to create stunning shirt mockups that elevate your online presence.
This comprehensive guide will delve into the intricacies of shirt mockup creation in Photoshop, empowering you with the knowledge and skills to showcase your designs in the most effective way. We will explore every step of the process, from importing and preparing your design to applying realistic textures and shadows. Along the way, we will provide practical tips, tricks, and best practices to ensure that your mockups look professional and captivating.
Step 1: Gathering Materials
Before embarking on the mockup creation journey, it’s essential to gather the necessary materials:
- Your shirt design: This can be a high-resolution image or a layered PSD file.
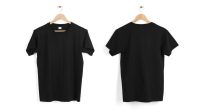
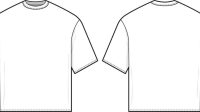
- A blank shirt template: Choose a Photoshop template that matches the type of shirt you want to showcase (t-shirt, polo, hoodie, etc.).
- Additional resources: These may include textures, patterns, or other design elements to enhance the realism of your mockup.
Step 2: Importing and Preparing Your Design
Open Adobe Photoshop and create a new document. Import your shirt design into the document and resize it to fit the blank shirt template. Use the Transform tools (Edit > Transform) to align the design precisely on the shirt.
If your design is in layers, select all the layers and merge them together (Layer > Merge Layers). This will simplify the editing process and prevent any discrepancies between layers.
Step 3: Wrapping the Design Around the Shirt
To realistically drape your design around the shirt, follow these steps:
- Select the shirt template layer.
- Go to Layer > Warp > Perspective.
- Adjust the warp grid until the design conforms to the contours of the shirt.
Alternatively, you can use the Puppet Warp tool (Edit > Puppet Warp). Add control points around the design and manipulate them to achieve a natural drape.
Step 4: Applying Textures and Shadows
Textures and shadows add depth and realism to your mockups. Here’s how to incorporate them:
- Textures: Import the desired texture (e.g., fabric, crease) into the document. Place it above the shirt template layer and set the blending mode to Multiply. Adjust the opacity to control the intensity of the texture.
- Shadows: Create a new layer above the shirt template layer. Fill it with black and change the blending mode to Multiply. Use the Brush tool (B) with a soft, round brush to paint shadows on the creases and folds of the shirt.
Step 5: Refining Details and Effects
Once the basic elements are in place, it’s time to refine your mockup:
- Adjustments: Use the Adjustment layers (Layer > New Adjustment Layer) to tweak the brightness, contrast, and saturation of your mockup.
- Effects: Add visual interest by applying effects such as Drop Shadow or Outer Glow to the shirt or design layer.
- Background: Consider adding a background to your mockup, such as a solid color or an image, to enhance the presentation.
Step 6: Saving and Exporting Your Mockup
When you’re satisfied with your mockup, save it in a high-quality format for sharing or using in your marketing materials:
- File > Save As.
- Choose a file format (e.g., JPEG, PNG, PSD).
- Set the desired resolution and quality settings.
Best Practices for Creating Professional Mockups:
- Use high-resolution images: Both your shirt design and the blank shirt template should be in high resolution to ensure a crisp and clear mockup.
- Pay attention to lighting: The lighting in your mockup should be consistent and natural-looking. Use a soft light source to avoid harsh shadows.
- Consider the background: The background of your mockup should complement your design and enhance its visual impact.
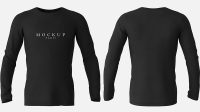
- Provide multiple angles: Showcase your design from different angles (front, back, side) to give customers a comprehensive view of the product.
Troubleshooting Common Issues:
- Distorted design: Incorrectly applying the warp transformation can distort your design. Ensure you adjust the grid carefully to achieve a natural drape.
- Unrealistic shadows: Shadows should follow the contours of the shirt. Use a soft brush and adjust the opacity to create subtle and realistic shadows.
- Poor image quality: If your mockup appears pixelated or blurry, increase the resolution of your design and blank shirt template.
FAQs:
Q: Can I use free shirt templates?
A: Yes, there are many free shirt templates available online. However, be sure to choose templates that are high-quality and suitable for your design needs.
Q: Can I create mockups for other types of apparel?
A: Yes, the techniques described in this guide can be applied to create mockups for various apparel items, including pants, hoodies, dresses, and hats.
Q: How can I make my mockups more unique?
A: Experiment with different textures, patterns, and effects to create unique and eye-catching mockups. You can also add custom elements, such as tags or labels, to personalize your designs.
Q: Can I use mockups for commercial purposes?
A: Most shirt templates are provided with commercial licenses, allowing you to use the mockups for marketing and promotional materials. However, always check the license agreement of the template you’re using.
Conclusion:
Creating shirt mockups in Adobe Photoshop empowers you to showcase your apparel designs in a professional and visually appealing manner. By following the steps outlined in this guide and implementing the best practices discussed, you can produce stunning mockups that effectively engage your customers and drive sales. Remember to experiment with different techniques and refine your skills over time to create mockups that truly reflect the quality and uniqueness of your products.


