Step-by-Step Guide on Creating Professional T-Shirt Mockups in Illustrator
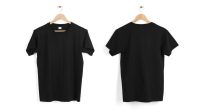
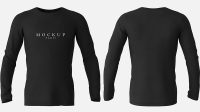
Creating T-shirt mockups is a valuable skill for designers, especially those in the apparel industry. A well-crafted mockup can showcase your designs in a realistic and eye-catching way, helping you sell more products or secure client approvals. In this comprehensive guide, we will explore how to create professional T-shirt mockups using Adobe Illustrator, one of the most popular vector graphic design software.
1. Create a New Document
- Launch Adobe Illustrator and select "File" > "New" to create a new document.
- Set the document size to the desired dimensions of your mockup. For a standard T-shirt mockup, a width of 1000px and a height of 1200px is recommended.
- Choose "RGB Color Mode" as this is suitable for digital display.
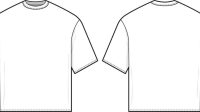
2. Design the T-Shirt Template
- Use the "Rectangle Tool" (M) to create a rectangle the size of your desired T-shirt.
- Set the "Fill" color to white to represent the T-shirt fabric.
- Round the corners of the rectangle slightly using the "Corners" option in the "Transform Panel".
3. Create the T-Shirt Collar
- Use the "Pen Tool" (P) to draw a curved path for the collar.
- Select the path and use the "Stroke Panel" to set the "Stroke Width" to 5px and the "Stroke Color" to black.
- Add two small circles for the collar buttons using the "Ellipse Tool" (L).
4. Design the T-Shirt Sleeves
- Use the "Pen Tool" to draw the shape of the T-shirt sleeve.
- Select the path and use the "Stroke Panel" to set the "Stroke Width" to 5px and the "Stroke Color" to black.
- Create the cuff by drawing a smaller rectangle at the bottom of the sleeve and filling it with black.
5. Add Details and Shadows
- Add a "T-Shirt" text to the front of the T-shirt using the "Type Tool" (T).
- Use the "Gradient Tool" (G) to create a subtle gradient on the T-shirt to give it depth and dimension.
- Add a "Drop Shadow" effect to the T-shirt using the "Effect" > "Stylize" > "Drop Shadow" panel.
6. Place Your Design on the T-Shirt
- Open your T-shirt design in Illustrator and copy it.
- Paste the design onto the T-shirt mockup document.
- Adjust the size and position of your design as needed.
7. Apply a Warp Effect (Optional)
- To make the design appear as if it’s printed on a real T-shirt, you can apply a "Warp Effect".
- Select the design and go to "Effect" > "Warp" > "Arch".
- Adjust the settings to create a slight curve on the design.
8. Add a Background
- To make your mockup more realistic, you can add a background.
- Create a new layer and place an image or color swatch behind the T-shirt.
9. Export the Mockup
- Once you’re satisfied with your mockup, go to "File" > "Export" > "Export for Screens".
- Choose a file format like PNG or JPEG.
- Adjust the image quality and resolution as needed.
Additional Tips:
- Use high-resolution images for your design to maintain clarity.
- Experiment with different colors and textures to create unique mockups.
- Add wrinkles or folds to the T-shirt for a more realistic look.
- Showcase your mockups in different environments to demonstrate their versatility.
FAQ
1. What is the difference between a raster and vector image?
Raster images are made up of pixels, while vector images are created using mathematical equations. Vector images can be scaled infinitely without losing quality.
2. How can I make my design look realistic on the T-shirt?
Apply a "Warp Effect" to your design to make it appear as if it’s printed on the fabric.
3. Can I add my own logo or branding to the mockup?
Yes, you can add any text or graphics to the mockup by using the "Type Tool" or "Place Image" command.
4. What file format should I use to export my mockup?
For digital display, PNG or JPEG formats are recommended. For print purposes, consider using a higher-quality format like TIFF.
5. Can I use Illustrator to create mockups for other garments?
Yes, the principles outlined in this guide can be applied to creating mockups for hoodies, sweatshirts, pants, and other apparel items.


