
The Comprehensive Guide to Creating a Simple T-shirt Template
Introduction
T-shirts, the ubiquitous wardrobe staples, transcend age, gender, and style boundaries. They offer a versatile canvas for personal expression, brand promotion, and artistic endeavors. Whether you’re a seasoned designer or venturing into the world of apparel creation, crafting a simple t-shirt template is an essential skill. This comprehensive guide will equip you with the knowledge and techniques to create a professional-looking template that serves as the foundation for your t-shirt designs.
Step 1: Understanding T-shirt Anatomy
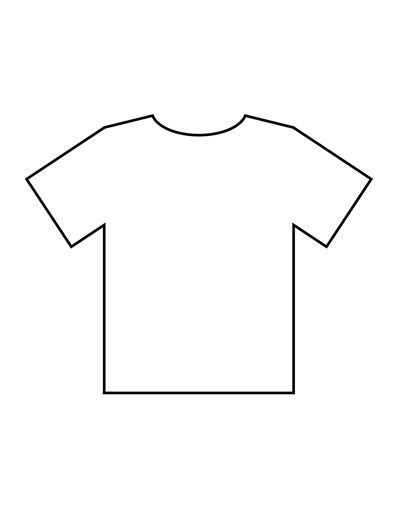
To design an effective template, it’s crucial to understand the basic anatomy of a t-shirt. This includes:
- Front: The main printing area, usually larger than the back.
- Back: The second printing area, often used for larger designs or text.
- Collar: The fabric that surrounds the neckline.
- Sleeves: The fabric that covers the arms, available in various lengths.
- Hem: The folded and sewn edge of the fabric at the bottom of the t-shirt.
Step 2: Choosing the Right Software
There are numerous software applications available for creating t-shirt templates. Some popular options include:
- Adobe Photoshop: A comprehensive image editing software with advanced design capabilities.
- GIMP: A free and open-source image editor that offers many of Photoshop’s features.
- Inkscape: A vector graphics editor suitable for designing simple shapes and text.
- Affinity Designer: A professional-grade vector graphics editor with a user-friendly interface.
Step 3: Setting Up the Document
Once you have selected your software, set up a new document with the following parameters:
- Size: Determine the size of your template based on the print area of your t-shirt.
- Resolution: Use a resolution of 300 dpi (dots per inch) for high-quality prints.
- Color Mode: Choose CMYK (Cyan, Magenta, Yellow, Key) for printing purposes.
Step 4: Creating the Front Template
- Draw the Front Shape: Use the Rectangle Tool to draw a rectangle that represents the front print area.
- Add the Collar: Create a curved shape above the rectangle to represent the collar.
- Define the Sleeve Outline: Draw two curved lines on the sides to indicate the sleeve openings.
- Adjust the Hem: Fold and sew the bottom edge of the rectangle to create the hem.
Step 5: Creating the Back Template
- Copy the Front Shape: Duplicate the front template and flip it horizontally.
- Adjust the Hem: The back hem is typically higher than the front hem. Adjust it accordingly.
- Add Optional Details: You can add additional elements to the back template, such as a pocket or hood.
Step 6: Saving the Template
Once you have completed the front and back templates, save them as separate files in a suitable format such as PSD (Photoshop), PDF, or AI (Adobe Illustrator).
Advanced Techniques
1. Using Layer Masks
Layer masks allow you to hide or reveal parts of a layer without affecting the original image. This technique is useful for creating complex shapes or adding effects to specific areas.
2. Working with Vectors
Vectors are mathematical curves that allow for creating sharp and scalable designs. Inkscape and Affinity Designer are excellent options for creating vector-based t-shirt templates.
3. Adding Text
To add text to your template, use the Type Tool and select a suitable font. Adjust the font size, style, and color to suit your design.
4. Previewing the Template
Before finalizing your template, create a mock-up to see how your designs will look on an actual t-shirt. There are online tools and software that allow you to preview your designs on different t-shirt styles and colors.
FAQs
- What is the best material for a t-shirt template?
The best material depends on the desired outcome. Cotton is a popular choice for its softness and breathability, while polyester is more durable and wrinkle-resistant. Blends of cotton and polyester offer a balance of both properties.
- How do I choose the right size for my template?
Refer to the garment’s size chart to determine the print area. Measurements should be taken from seam to seam to ensure accuracy.
- Can I use my template for commercial purposes?
The usage rights of a template depend on the software you use and the terms and conditions of the template provider. Some software may require additional licensing for commercial use.
- How do I print my t-shirt designs?
There are various printing methods available, including screen printing, digital printing, and heat transfer. Choose the method that best suits your design and budget.
- What are some creative ways to use t-shirt templates?
T-shirt templates can be used for personalizing clothing, promoting businesses, creating event merchandise, or expressing artistic vision. Experiment with different colors, patterns, and graphics to create unique and eye-catching designs.
Conclusion
Creating a simple t-shirt template is a fundamental skill that empowers you to bring your design ideas to life. By following the steps outlined in this guide, you can confidently design professional-grade templates that serve as the foundation for your creative endeavors. From casual wear to promotional items, the possibilities are endless when it comes to expressing yourself through custom-designed t-shirts. So, gather your inspiration, choose the right software, and embark on a journey of creativity that will bring your vision to the forefront of every wardrobe.


