Snapback Mockups: A Comprehensive Guide to Design and Presentation
Introduction
Snapback caps, with their classic silhouette and adjustable strap, have become ubiquitous in the world of fashion and sportswear. They are versatile, stylish, and perfect for showcasing branding and designs. To effectively present your snapback designs to clients or for marketing purposes, creating realistic and high-quality mockups is crucial. This article will provide a comprehensive overview of snapback mockups, covering their benefits, types, creation process, and best practices for effective presentation.
Benefits of Using Snapback Mockups
-
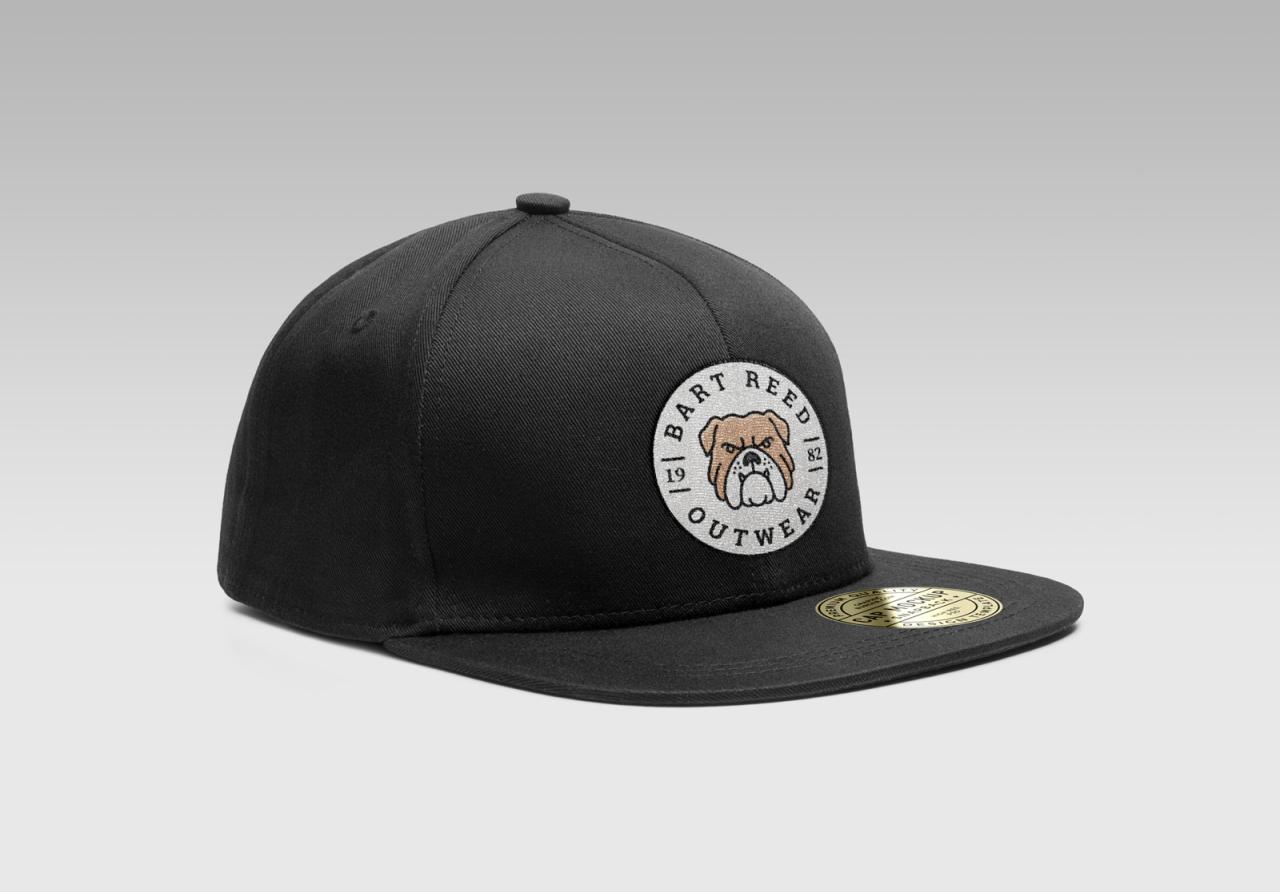
Realistic Presentation: Mockups enable designers to showcase their designs on a physical representation of the product, providing a realistic impression of how the design will look on an actual snapback.
-
Branding Consistency: Mockups ensure that your designs are presented in a controlled environment, maintaining visual consistency across different marketing materials.
-
Enhanced Communication: By presenting designs through mockups, designers can effectively communicate their ideas to clients, facilitating feedback and preventing misunderstandings.
-
Time and Cost Savings: Creating mockups digitally eliminates the need for physical production, saving time and resources compared to traditional photoshoot methods.
Types of Snapback Mockups
-
Front View Mockups: These mockups display the design on the front of the snapback, providing a straightforward and eye-catching presentation.
-
Side View Mockups: Side view mockups offer a more comprehensive view of the snapback, showcasing both the front and side designs.
-
Flat Lay Mockups: Flat lay mockups present the snapback laid flat on a surface, providing a more natural and lifestyle-oriented perspective.
-
3D Mockups: 3D mockups allow designers to create interactive and dynamic presentations, allowing viewers to rotate and zoom in on the design from different angles.
Creating Snapback Mockups
-
Gather Materials: Begin by selecting high-resolution images of the snapback in various angles. Ensure that the images are consistent in lighting and background.
-
Choose a Mockup Template: Select a mockup template that aligns with your design presentation needs. Various online and offline resources provide a wide range of mockup templates.
-
Insert Your Design: Import your design onto the mockup template using image editing software. Position and resize the design accurately to match the product specifications.
-
Adjust Lighting and Shadows: Fine-tune the lighting and shadows of the mockup to create a realistic and professional presentation. Adjust the brightness, contrast, and hue to enhance the design’s visual impact.
-
Add Details: Consider adding additional details to the mockup, such as a background, accessories, or typography, to improve the overall presentation.
Best Practices for Effective Presentation
-
Use High-Quality Images: Ensure the images used in the mockups are of high resolution and capture the details of the design accurately.
-
Choose Appropriate Mockup Templates: Select mockup templates that complement the design style and target audience. Consider both the aesthetic appeal and functionality of the mockups.
-
Pay Attention to Lighting: Lighting plays a crucial role in enhancing the realism of mockups. Adjust the lighting to create a professional and visually appealing presentation.
-
Add Context: Incorporate contextual elements, such as a background or lifestyle setting, to provide a more immersive and relatable presentation of your design.
-
Present Multiple Views: Showcase your design from different angles by using multiple mockups. This allows viewers to fully appreciate the design and its versatility.
Conclusion
Snapback mockups are essential tools for designers and marketers to showcase their designs in a realistic and impactful manner. By utilizing the benefits, understanding the types, following the creation process, and adhering to best practices for presentation, you can effectively communicate your design ideas, enhance your branding, and captivate your audience.
Frequently Asked Questions (FAQs)
Q: What is the best software for creating snapback mockups?
A: Popular software options include Adobe Photoshop, Illustrator, and specialized mockup creation tools like Smartmockups.
Q: Where can I find free snapback mockup templates?
A: Websites like Freepik, Pixeden, and Mockupworld offer a wide selection of free and premium snapback mockup templates.
Q: How do I add textures and effects to my snapback mockups?
A: Use image editing software like Photoshop to add textures, overlays, and other effects to enhance the realism and visual appeal of your mockups.
Q: Can I use snapback mockups for commercial purposes?
A: Check the license terms of the mockup templates you use. Some templates may have restrictions on commercial use.
Q: How do I make my snapback mockups stand out?
A: Utilize creative lighting, experiment with unique angles, and incorporate contextual elements to differentiate your mockups and make them more visually appealing.


