A Comprehensive Guide to Creating T-Shirt Mockups in Photoshop
T-shirt mockups are essential for showcasing your designs and providing a realistic preview of how they will look on a physical garment. With Adobe Photoshop, you have a powerful tool at your disposal to create professional-looking mockups that will elevate your designs.
This comprehensive guide will walk you through the step-by-step process of creating a T-shirt mockup in Photoshop, from setting up your workspace to adding your design and finalizing the mockup. We will cover everything you need to know, including:
- Understanding T-Shirt Mockup Templates
- Preparing Your Design for Mockup
- Setting Up Your Photoshop Workspace
- Importing and Placing Your Design
- Adjusting the Design to Fit the Mockup
- Adding Realistic Details and Effects
- Customizing the Background
- Saving and Exporting Your Mockup
Understanding T-Shirt Mockup Templates
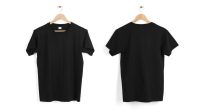
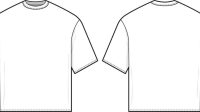
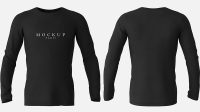
Before you begin, it’s important to understand T-shirt mockup templates. These templates provide the base for your mockup, including the shape and dimensions of the t-shirt, as well as lighting and shadows. There are various free and premium mockup templates available online.
Preparing Your Design for Mockup
Your design should be in a high-resolution format, such as PNG or PSD, with a transparent background. Ensure your design is sized appropriately for the t-shirt you are using.
Setting Up Your Photoshop Workspace
-
Open Photoshop: Launch Adobe Photoshop on your computer.
-
Create a New Document: Go to File > New to create a new document. Set the dimensions to the desired size of your mockup. Typically, 2000 x 2000 pixels is suitable for web presentations.
-
Choose a Background Color: Select the background layer and set the color to white or any desired background color.
-
Enable Transparency: Click on the Layer menu and select New > Layer. Name it "Mockup" and check the Transparency box. This layer will serve as the base for your mockup.
Importing and Placing Your Design
-
Import Your Design: Go to File > Place Embedded and select your design file. Position the design on the "Mockup" layer.
-
Adjust Size and Position: Use the Free Transform tool (Ctrl/Cmd + T) to adjust the size and position of your design. Hold Shift while transforming to maintain the aspect ratio.
Adjusting the Design to Fit the Mockup
-
Fit to T-Shirt Shape: Select the "Mockup" layer and go to Edit > Transform > Warp. Adjust the mesh points to fit the design to the contours of the t-shirt.
-
Create Folds and Wrinkles: Use the Liquify Filter (Filter > Liquify) to add realistic folds and wrinkles to the design. Experiment with the tools to create natural-looking effects.
Adding Realistic Details and Effects
-
Add Shadows and Highlights: Go to Layer > New Layer > Layer Mask. Select a soft brush and paint black on the mask to create shadows on the design. Similarly, paint white to create highlights.
-
Adjust Lighting: Use the Levels (Image > Adjustments > Levels) and Curves (Image > Adjustments > Curves) adjustments to fine-tune the lighting and contrast of the mockup.
-
Apply Textures: Add textures to the fabric using the Texture Overlay effect (Layer > Layer Style > Texture Overlay). This can enhance the realism of the mockup.
Customizing the Background
-
Change Background Color: Double-click on the background layer and choose a new color from the Color Picker.
-
Add a Gradient: Go to Layer > New Fill Layer > Gradient. Create a gradient to add depth and interest to the background.
-
Insert an Image: You can import an image to use as the background. Go to File > Place Linked and select the image file.
Saving and Exporting Your Mockup
-
Save Your Mockup: Go to File > Save As and choose a file format (PSD, JPEG, or PNG).
-
Export for Web: If you’re creating a mockup for web presentation, go to File > Export > Save for Web (Legacy). Adjust the quality and file size for optimal performance.
-
Export for Print: For print purposes, go to File > Export > PDF. Choose the desired settings for high-resolution printing.
Frequently Asked Questions (FAQ)
Q: What are the advantages of using T-shirt mockups?
A: T-shirt mockups provide a realistic preview of your designs, helping you present them professionally and effectively. They allow you to showcase your designs on different t-shirt styles, colors, and backgrounds.
Q: What is the best file format for exporting my mockup?
A: For web presentations, JPEG or PNG formats with optimized quality settings are suitable. For print, use PSD or PDF to preserve the high resolution and editing capabilities.
Q: Can I use my own photos or create custom t-shirt templates?
A: Yes, it’s possible to create your own t-shirt templates or use your photos as the background for your mockups. Import your images into Photoshop and adjust them to fit the desired t-shirt shape.
Q: How do I add branding or logos to my mockups?
A: Import your branding or logo as a separate layer in Photoshop. Adjust its size and position, and blend it with the mockup using layer masks or blending modes.
Q: Can I create mockups for different t-shirt colors and styles?
A: Yes, many t-shirt mockup templates come with multiple color and style options. Simply select the desired variant from the template or create a new layer with a different t-shirt image.
Conclusion
Creating T-shirt mockups in Photoshop is a valuable skill for designers and marketers alike. By following the steps outlined in this guide, you can produce professional-quality mockups that showcase your designs in a realistic and engaging manner. Remember to experiment with different techniques and customize your mockups to match your branding and target audience.


