How to Mockup a T-shirt in Photoshop: A Comprehensive Guide for Designers
Introduction
Creating realistic T-shirt mockups is an essential skill for clothing designers and e-commerce businesses alike. By showcasing your designs on a lifelike T-shirt, you can effectively present your products to potential customers and make them more visually appealing. Photoshop has proven to be an invaluable tool for creating such mockups, boasting a wide range of features and capabilities for designers.
This comprehensive guide will take you through the process of creating a T-shirt mockup in Photoshop, step by step. From importing your design to adding realistic details and textures, we’ll cover everything you need to know to create professional-quality mockups that will elevate your designs.
Step 1: Import Your T-shirt Template
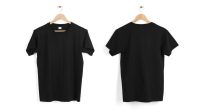
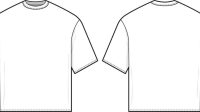
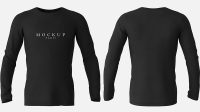
Begin by downloading a T-shirt template from a reputable source. Numerous free and premium templates are available online, offering a variety of T-shirt styles and shapes. Choose a template that closely resembles the type of T-shirt you want to create a mockup for.
Once you have your template, import it into Photoshop by going to File>Open and selecting the template file. Your template should appear as a new layer in the Layers panel.
Step 2: Place Your Design on the T-shirt
Open the design you want to place on the T-shirt in Photoshop. Select the design layer and copy it (Ctrl/Cmd+C). Switch back to the T-shirt template document and paste the design onto the T-shirt layer (Ctrl/Cmd+V).
Adjust the size and position of your design until you’re satisfied with its placement. You can use the Free Transform tool (Ctrl/Cmd+T) to resize, rotate, and move the design.
Step 3: Add Shadows and Highlights
To make your design look more realistic on the T-shirt, you need to add shadows and highlights. Create a new layer above the design layer and name it "Shadows." Using a soft black brush, paint in shadows where the folds and creases of the T-shirt would naturally occur.
Create another new layer above the design layer and name it "Highlights." Using a soft white brush, paint in highlights where the light would naturally hit the T-shirt.
Adjust the opacity of the shadows and highlights layers to fine-tune the realism of your mockup.
Step 4: Add Realistic Fabric Textures
To further enhance the realism of your mockup, you can add fabric textures to the T-shirt. There are several ways to do this:
-
Apply a Fabric Texture Overlay: Download a high-quality fabric texture image and drag it into your Photoshop document. Position the texture layer above the T-shirt layer and change its blending mode to Overlay. Adjust the opacity and scale of the texture to create a subtle fabric effect.
-
Use the Emboss Filter: Select the T-shirt layer and go to Filter>Stylize>Emboss. Adjust the settings to create a subtle embossed effect that mimics the texture of a T-shirt.
Step 5: Create a Realistic Background
The background of your mockup can greatly impact the overall presentation of your design. Consider using a simple, neutral background color or a themed background that complements your design.
To create a simple background, create a new layer below the T-shirt layer and fill it with a solid color using the Paint Bucket tool (G). Alternatively, you can search for free or premium background textures online and overlay them onto your mockup.
Step 6: Add Additional Details
To make your mockup even more realistic, you can add additional details such as wrinkles, folds, or creases to the T-shirt. Use a combination of the Brush tool and the Warp tool (Edit>Transform>Warp) to create subtle distortions and folds in the fabric.
Step 7: Export Your Mockup
Once you’re satisfied with your mockup, it’s time to export it. Go to File>Export>Save for Web (Legacy). Choose the desired file format (e.g., PNG, JPEG) and quality settings. Click Save to export your mockup.
Tips for Creating Professional-Quality Mockups
-
Use High-Resolution Images: The higher the resolution of your template and design, the more realistic your mockup will be.
-
Pay Attention to Lighting: Make sure the lighting in your mockup is consistent and natural. This will help highlight your design and create a sense of depth.
-
Add Subtle Depth of Field: Using a slight depth of field effect can help draw attention to your design while blurring the background.
-
Experiment with Different Perspectives: Don’t limit yourself to only front-view mockups. Explore different angles and perspectives to showcase your design from various viewpoints.
-
Use Smart Objects: Converting your T-shirt template and design into Smart Objects allows you to make non-destructive edits and try out different variations without affecting the original files.
FAQ
Q: What is the best T-shirt template to use?
A: The best T-shirt template depends on the specific design you want to create. Consider factors such as the style, neckline, and color of the T-shirt.
Q: What is the best way to add realistic shadows and highlights?
A: Use a soft brush and adjust the opacity of the shadow and highlight layers to create realistic effects. Experiment with different brush sizes and shapes for more detailed lighting.
Q: How can I create the effect of a folded or crumpled T-shirt?
A: Use the Warp tool to create subtle distortions and folds in the fabric. You can also add a gradient layer to create a subtle color shift that mimics the effect of wrinkles.
Q: What are some creative ways to showcase my T-shirt mockups?
A: Consider creating a series of mockups in different settings, such as on a model, in a lifestyle photo, or against a unique background. Additionally, you can create a social media campaign or use your mockups to create attractive product listings.
Conclusion
Creating T-shirt mockups in Photoshop is a valuable skill that can enhance the presentation of your designs. By following the steps outlined in this guide, you can create realistic and professional-looking mockups that will make your designs stand out. With a little practice and experimentation, you can master the art of T-shirt mockups and create stunning visuals that will impress clients and customers alike.


